When I first purchased the Focus, I bought it in April, and it came with a set of pretty worn winter tires. For those who aren't familiar, you essentially have three choices when it comes to "seasonality" of tires. Summer tires offer excellent wet/dry performance over 40° F, winter tires offer excellent wet/dry performance under 40° F, and "all-season" tires attempt to offer pretty good performance across all temperatures. I've always run all-season tires, since I never really cared about getting peak performance, and the cars I've owned have generally been AWD and low torque, so they performed well enough during the winter. That wasn't the case with my current tires, though. I was running a set of BFGoodrich g-Force COMP-2 A/S Ultra High Performance All-Season tires. And they were pretty good! But their snow/ice handling was meh enough that in hilly Somerville they were kind of a pain.
So, in the Spring, I decided to order some summer tires, and a set of rims to go with them! That way, I could swap some winter tires onto my current rims, and then have a set of summer/winter that I could swap in my driveway, instead of paying a shop. I browsed Tire Rack, and they had a special on some Motegi MR116 18" rims, matte black, with a red stripe. Perfect! They also had a special on a set of Pirelli P Zero PZ4 Max Performance summer tires. I was taking a bit of a chance ordering Max Performance tires on our crappy New England roads, but decided screw it. Who cares about a little more bumpiness/road noise, I can worry about that when I'm old.
I had Tire Rack mount and balance the tires, and bought a TPMS tool so I could sync the stupid TPMS to the new tires. So far, so good! When the wheels arrived around the end of March, I was all pumped and ready to install them, but decided to wait until after I'd done the brakes, etc. It was that project that ended up creating a new problem.

As part of the brake job, I added 25mm/20mm hub centric spacers from GarageLine . While they enhance the look of the car, the primary reason was I needed space for the front brakes to clear. An unintended side effect was I was now unable to mount any rims except the stock rims! As you can see in the above photos, the studs from the hub poke through the spacer, and while the stock wheels (for some unknown reason) have a channel in the back to accommodate this, the MR116 wheels did not. Since the MR116 are 5 lug universal , they actually have 10 holes, and the secondary set of holes was so close to lining up, but was off by a couple millimeters. So, for the time being, with other projects to do, I gave up on mounting them.
Well, those wheels sat in my basement for months, a $1500 investment going to waste. I considered giving up on my summer/winter tire dreams, since with the stock wheels painted, they looked sweet, and I could probably find a buyer for the set of 4. However, I don't like losing, and decided that I needed to explore my options. One option included cutting the studs down, which I was super not into, since if I screwed it up, I'd be left in my driveway with a non-movable car. The second involved installing shorter studs, which seemed doable, except that the front studs are a giant pain to replace, and I might as well just replace the wheel bearings. I even brought it to a shop I like, and they didn't think it was a good idea to cut/install shorter studs, since the fronts would have to be flush with the open ended lug nuts, which means they could come loose. The shop owner did suggest a crazy idea that I'd also had. Drill out the secondary set of holes more! It's a terrible idea to drill out lug holes you're fastening to, but the secondary holes I'd never use, and it... might work. I hadn't considered it, since it would involve damaging my rims, and I would be unable to sell them.

I measured the max hole diameter possible, which was ~1", and headed to my local Harbor Freight Tools to find the cheapest "high speed" step bit possible. If you don't know what Harbor Freight Tools is, it is essentially the mecca of incredibly cheap, Chinese-made tools and other hardware stuff. It's almost entirely in-house brands, with hilarious names like EARTHQUAKE XL. I'd never trust my life to the tools they sell, but it is an excellent place to buy really cheap tools and assorted items, assuming they don't instantly break. Drill bits are one of those things that are expensive and, at Harbor Freight, they're cheaper, though who knows if they'll melt or what they're actually made out of. The bit above worked great on the soft metal of the rims! Check out the below for my high-tech workstation, and a rim-in-progress.


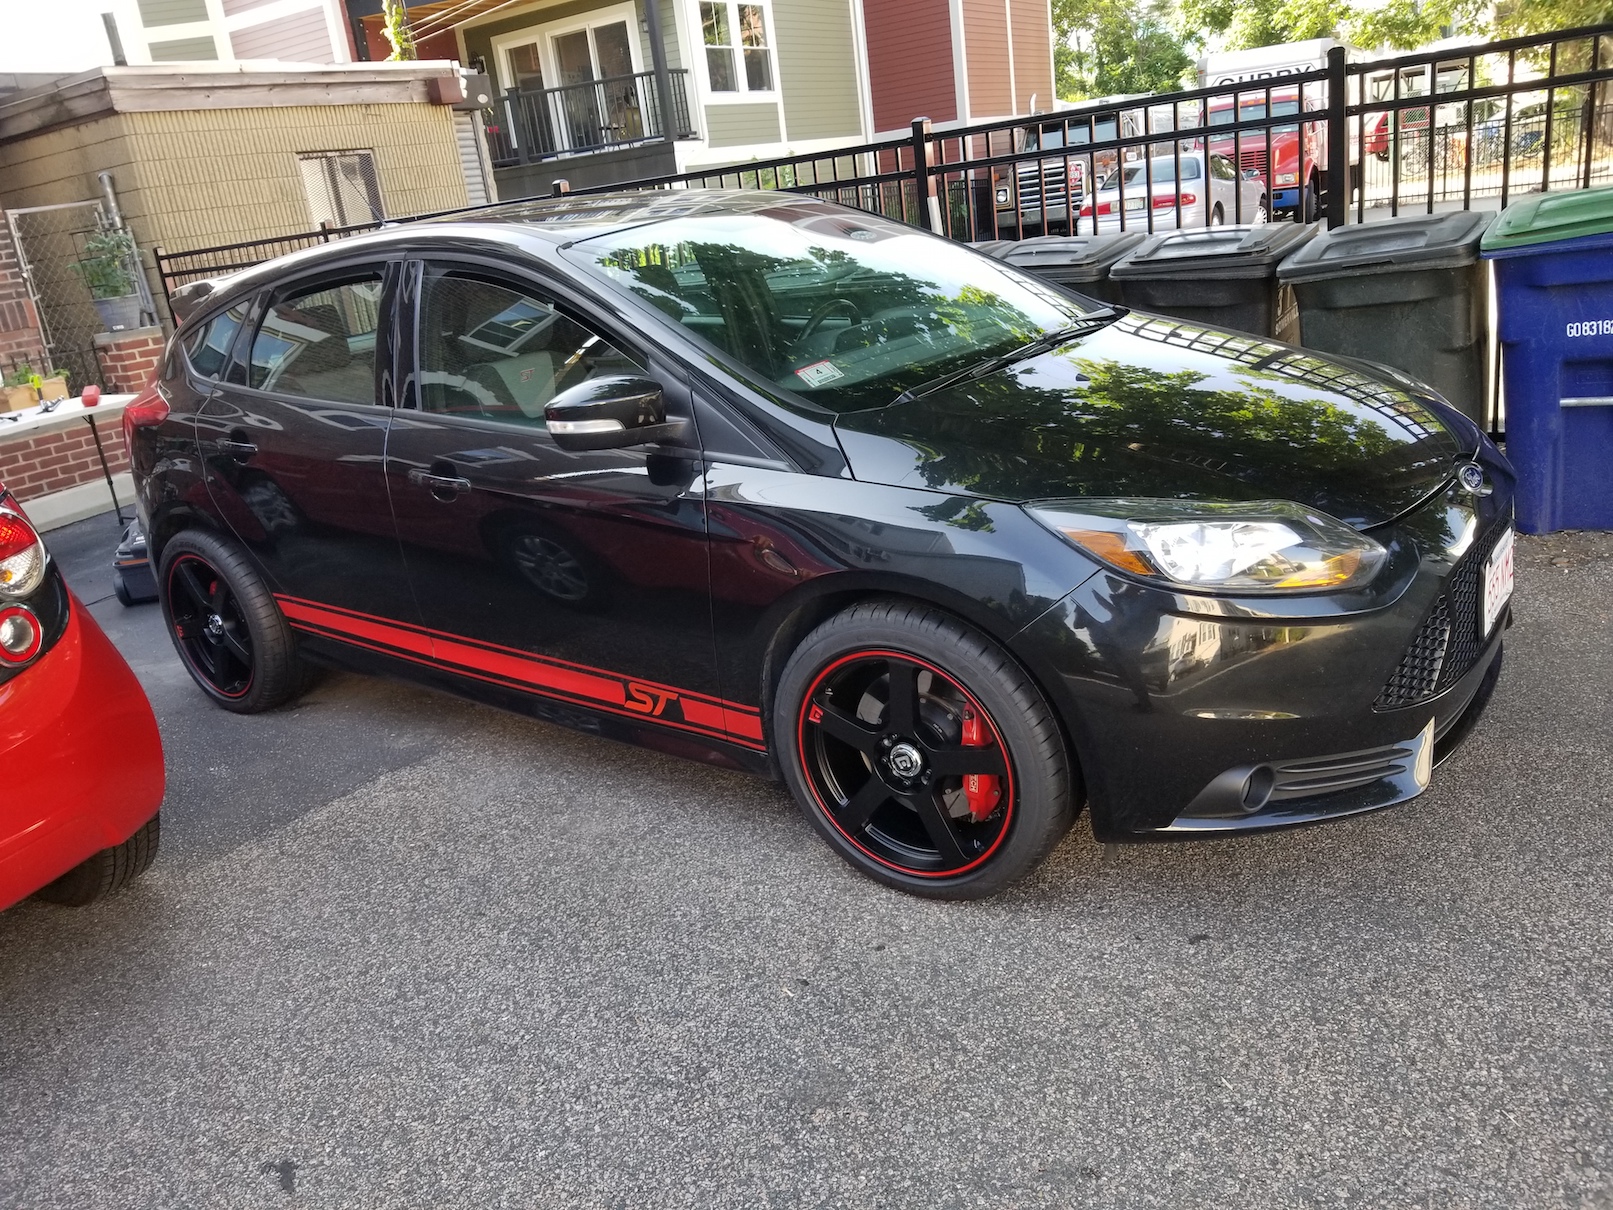
After finishing the first rim, I mounted it on the car and... it fit! It was the best feeling in the world, watching that rim go on. Sure, I still had 3 more wheels to go, but at least I knew it was possible! I'd established a cadence of drill-out-holes, take a break, mount rim-on-vehicle, move onto next rim. This prevented my shoulders/forearms from getting too tired, and meant that I was able to ensure that each rim fit on the car as I drilled them out. After torqueing down the last rim, I inflated the tires to 38 PSI (2 PSI above spec, but it was warm out), and decided it was time to drive, mostly to make sure the wheels felt OK, didn't rub anything, and most importantly, didn't fall off the car. A few blocks of driving, and things felt great! My brother Steve came by to grab dinner, and we took a test drive up 28 to find a stretch of road that I could take corners a little quicker on. The tires feel amazing, and even though the rims are lighter/tires are max performance, the ride/road noise feels pretty similar to the old tires. The grippiness/cornering is vastly improved though. The Pirellis were definitely work it!

I'm really happy I decided to bite the bullet, and put faith in my general ability to just make-the-damn-thing-work, instead of trying to recoup the money I spent. While I ran into some initial difficulty, with perseverance, planning, and the purchase of a $17 drill bit, I was able to finally make this happen. Next up is flushing the oil again tomorrow, since when I changed it last week, I found some gritty crap that likely got in when I installed the oil catch can a few weeks ago. Can't have sand circulating in the engine/turbo! I also ordered an oil analysis kit from Blackstone so I can send in a sample in the fall, to find out what parts of my engine are (potentially catastrophically) failing. Other than that, though, I'm looking forward to enjoying the Focus through the rest of the summer. It's running great, looking great, and is just an incredibly fun car.
-Chris